


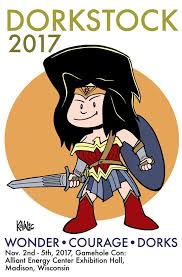
This upcoming coming weekend marks Gamehole Con, a fantastic gaming convention here in Madison, with a teeny tiny con-within-a-con called Dorkstock too go along with it!
And if there’s a Dorkstock, there’s surely an Igor Bar bake-off, around lunchtime, Saturday.
If you’re coming to Gamehole Con/Dorkstock, we’d love to see your take on the classic Igor Bar! Here’s the recipe as published in Geek Dad, a few years ago. Put on them oven miits, and get baking!
Even if you don’t want to bake Igor Bars (WHO DOESN’T WANT TO BAKE IGOR BARS???), do stop by and sample a few! You have nothing to fear but an insane and possibly life-threatening sugar rush fear itself!
(PLEASE NOTE: The Gameholecon/Dorkstock IGOR BAR Bake-Off was incorrectly listed for Friday, at 1 pm. It will be Saturday, at 1 pm. GET BAKING, folks!)
(1-2 Fri Slot 3 : Igor Bar Contest (Frances Moritz, John K. Scott Olman) Mendota Room)
IGOR BARS: the Recipe
In the fifteen years since their creation, Igor Bars have become semi-legendary on the gaming convention circuit. I actually came up with the idea for them when I needed to find the Ultimate Excessive Gaming Snack – at least in the eyes of Igor, the most excessive character in my comic strip Dork Tower (http://www.dorktower.com). Their ensuing popularity, though, took me totally by surprise.
Since 2002, when Igor Bars were first introduced into the Dork Tower comic book, they’ve taken on a life of their own. Conventions will hold Igor Bar cook-offs, and there are web pages dedicated to them. But two aspects make Igor Bars particularly suitable projects to share with your kids. The first is, there are three different stages that all lend themselves to children’s differing kitchen abilities.
The second – and possibly most important – thing that makes baking Igor Bars a great kids’ activity is that they are almost infinitely improvisational. Igor Bar bake-offs are great fun at cons because of the huge number of variations (some far more frightening than others) that appear. Kids can have a fun time making these sweet treats THEIRS. Don’t like peanuts? Add some Heath Bar pieces instead. LOVE nuts? Add some in the cookie dough, too!
The classic Igor Bar consists of a layer of pan-style chocolate-chip cookies (although any cookie that can be baked pan-style will do), a layer of peanuts and caramel (which acts as the glue that holds the bar together), and a layer of Rice Krispie ® treats. Cut into squares, these can serve 30 or more kids. Heck, they’ve been known to take down that many ADULTS. But the big trick is to keep them moist: Igor bars should be chewy and scrumptious, not crisp and brittle.
INGREDIENTS:
Pan-style Cookie Base Layer
• 2 1/4 cups all-purpose flour
• 1 t. baking soda
• 1 t. salt
• 1 cup butter, softened
• 3/4 cup granulated sugar
• 3/4 cup packed brown sugar
• 1 t. vanilla extract
• 2 eggs
• 1 (12 ounce) package semi-sweet chocolate chips
Caramel Middle Layer
• Two 14-oz bags Kraft Caramels
• 3 Tb. milk or evaporated milk
• 1 t kosher salt (optional)
• 1 1/2 cups dry-roasted peanuts
Rice Krispie Treat® Layer
• 3 Tb. butter
• 1 package (10 oz., about 40) marshmallow or 4 cups miniature marshmallows
• 6 cups Rice Krispies® or other rice cereal.
Topping
16 oz semi-sweet chocolate chips
You will also need:
• 15×10-inch jelly roll pan (a 9” x 13” x 2.5” or thereabouts lasagna-size pan can be substituted, but thicker Igor Bars may prove tough for little mouths)
• cooking spray, margarine or butter to grease the pan
• baking parchment paper
• two saucepans
• double-boiler. Two, preferably.*
Preheat an oven to 375 degrees.
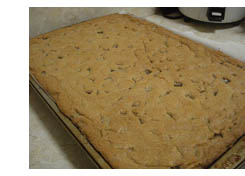 STEP ONE: PAN COOKIE LAYER
Grease a 15×10-inch jelly roll pan, and line it with parchment paper. Spray cooking spray onto the paper.
Combine the flour, baking soda and salt in small bowl. Beat the butter, the sugars and vanilla in large mixing bowl. Add eggs one at a time, beating well after each. Gradually stir the flour mixture into the butter mixture. Stir in the chocolate chips. Spread in the pan. Bake 20-25 minutes or until golden brown. (I usually go for slightly “underbaked” here, at a scant 20 minutes bake time, to keep the finished Igor Bars moist and chewy. If you prefer more solid bars, the pan cookie can be bake for a few more minutes.)
STEP TWO: PEANUTS AND CARAMEL LAYER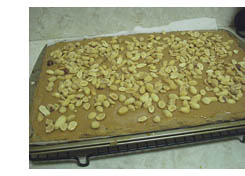
Once the pan cookie is done, it’ll need some time to cool. While it’s baking is a good time to start unwrapping the caramels. This is easily the most tedious part of Igor Bars. Nobody will blame you if you designate this step to the kids’ nimble little fingers. Fortunately, you can sacrifice one or two caramel squares, for bribery purposes.
Place the unwrapped caramels, along with the milk and the salt (salty caramel is possibly the strongest argument I can think of for the existence of a loving deity – ignore the salt if your taste and/or worldview differs) in a saucepan. Cook on medium-low until the caramels are completely melted, stirring constantly. (This is a better job for the older kids – hot caramel’s nothing you want all over the floor or – more importantly – your progeny, and possibly you.)
You can also use a double-boiler for this step, if you wish. It’ll be a slower process, but there’s no risk of forgetting the caramel until the pungent smell of burnt sugar tells you it’s too late. If you only have one double-boiler, wash it after the caramels are poured, because you’ll need it later.
Pour the finished salty caramel over the cooled pan cookie, and spread evenly. Sprinkle the cup and a half of dry-roasted or other peanuts on top of this.
STEP THREE: RICE KRISPIES® TREAT LAYER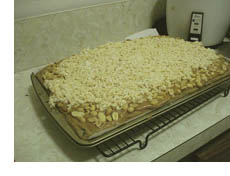
In a large saucepan over low heat, melt the butter and then add the marshmallows, stirring constantly until completely melted and mixed together. Remove from the heat and add the Rice Krispies®, one cup at a time, stirring them into the melted marshmallow. As soon as you have a mass of soft, crispy, chewy goodness, spread with a buttered spatula or wax paper on top of the caramel and peanut-layer.
Melt 16 oz of semi-sweet chocolate chips in a double-boiler. When melted, spoon or drizzle over the Igor Bars.
Wait until the bars are cooled, and cut into 2” –3” squares.
 VARIATIONS:
Almost anything and everything can be added to Igor Bars! Let the kids get creative. Change up the chocolate-chip cookie layer: try a sugar cookie or oatmeal cookie base, instead! Add things to the caramel layer. Switch the topping to peanut-butter Rice Krispie® treats. Throw on some cut-up Peanut Butter Cups or crumbled English toffee pieces. Try a layer of frosting! Ad malted milk balls! Coconut! Chopped cashews! Dare we mention bacon? Or all of the above!
Look, nobody ever accused Igor Bars of being health food. In the famous words of Cookie Monster, Igor Bars are possibly the ultimate “Sometime Food.”
* Not everyone has a double-boiler on-hand, let alone two. You can melt the caramels and the chocolate topping in the microwave, as long as you use a microwave-safe bowl. Microwave at one-minute intervals on “High,” stirring frequently until fully melted. Be careful: the bowls will get hot.
______________________________________________
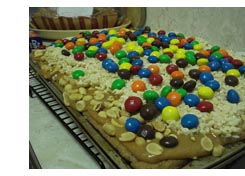
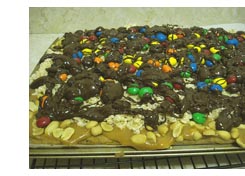 Thanks again, and thanks to Amy Stephenson of 107Cookbooks.com for the photos of her Beta Testing! (Note, she added an m&m layer to hers. Hmmmm. PRETZEL m&ms suddenly sound very Igor Bar-ish, right now…)
Anyway, for larger photos of the above, or to check out Amy’s step-by-step technique, CLICK HERE and head over to her marvelous blog. To quote Amy:
“Wow. Igor Bars are overwhelming. The juxtaposition of the caramel and the Rice Krispie layer is brilliant, and the contrasts are numerous: sweet and salty, chocolate and cookie, nut and sugar, marshmallow and butter. I felt slightly dizzy after finishing my square.”
Yer bestest pal forever,